
Showing posts with label baby/kids. Show all posts

Wednesday, March 23, 2011

Life - Trying to have a Ball

My deepest apologies to Debbie who seems to have been the only one posting lately.  I'm not going to try to get any sympathy from you, but (here's where I actually do try) I've had my hands full the last few weeks.

First, I had strep throat and my family caught something else almost as bad. Then I had a week long business trip in freezing Chicago (ok...I admit, it wasn't that cold, but So. Cal Girl was NOT comfortable). Then a quick family vacay to Disneyland which brought on bronchitis.  Again, the bronchitis itself wasn't that horrible...it was the almost peeing or peeing my pants every time I coughed. Let's just say there was a lot of coughing and a lot of laundry to do. So between all that, work, church, family and 4 prescriptions for anti-biotics...I'm feeling a lot better and can focus on a craft or two.

I'm not mentally prepared to make Easter projects, so I decided to make something for the baby shower I get to go to on Saturday. So I whipped up a diaper cake and decided that I wanted to top it with homemade fabric balls. All kids and babies like balls! So, here's what I made:
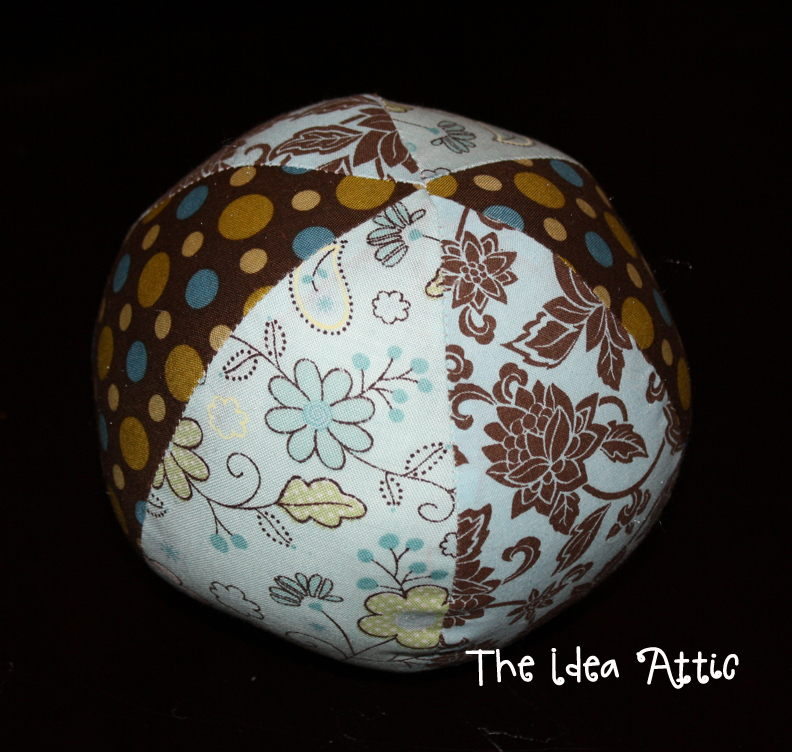


This is a perfect project for using all those left over fabric scraps. I looked for a pattern and I found a site that taught me how to make my own pattern as well as the cute easter bunny out of this same ball pattern.  Here is the link. Post pictures of your creation on our Facebook page if you make it. I think it's so cute but like I said, I'm not mentally ready for Easter stuff yet. So I created my own pattern. Here is the pic or you can click on this link to download the pdf version with instructions.


I cut a version of my pattern out of some thicker plastic like a thick sheet protector or something. Then I cut out 6 pieces from my fabric. The ball above was two pieces of three fabrics or you can do three pieces of two fabrics. Make sure you iron your pieces. I know...I know...I hate ironing. But it makes sewing your pieces together so much easier.

Decide how you want your patterns to go and then sew 3 pieces together, side by side. (Remember right sides facing for sewing.) Then with rights sides facing, sew the two sides of the ball together leaving a space to stuff the ball.Turn it right side out and stuff the ball. I like to put a jingle bell in there...just to make some noise. Then hand stitch the opening.


Here is one ball not stuffed with a section left open and the other one done.
I'm not a very good hand-sewer...but this is my "closing of the hole."
Here it is again.
My kids are loving playing with these. And they are so anxious to make their own. I told them it was like build-a-bear and they can put their own treasures inside their ball.


Here are the balls on top of the diaper cake. You can also see cute baby socks my friend Stacy decorated with crocheted on buttons. Maybe I'll convince her to be a guest blogger soon.

Oh...one more idea I had with this ball. I have to teach the kids music on Sunday at church, so I'm going to cut out 10 "pins" actually circles and I'm going to write songs on the back or ways to sing the song (ie whisper, hum, only girls, etc.) and I'm going to let them go bowling. They have to roll this ball and whichever "pin" it lands on will determine their singing fate. It should be fun!

Now that I'm healthy and there's less stress at work, maybe I'll take some time to have a ball, too!

Tuesday, March 15, 2011

The Switch


I am the mother of 4 young children who are still in the "bedtime routine" mode.

As is typical with most young ones, the dark is not their friend.

But, their parents LOVE the dark.

My husband came up with a solution that I think puts him in the genius category: A Dimmer Switch


Full disclosure: I thought he was weird when he first suggested putting a dimmer switch on the hallway light. Dimmers were for setting the mood, whether it was eating dinner at the dining room table or watching a movie in the family room. But he did it anyway, and I love it!

When the kids are first put to bed, we turn on the hallway light all the way on.


BUT...once they fall asleep, we dim the hallway light down. There's just enough light that if they wake up, they can find their way to the bathroom (or our room). But it's dark enough that the hallway light doesn't bother the adults that aren't scared of the dark.


Is that a "Bright Idea" or a "Dim Idea"?


Sunday, February 13, 2011

Tootsie Pop Love!

I know...I'm squeezing this post in at the last hour since Valentine's Day is tomorrow! But my good friend Katie showed me this blog post and I LOVED the idea! You may remember from previous posts, I am not a huge fan of Valentine's Day so I'm not going to break the bank and my back for school parties. So when I saw this I knew I had to do it! So simple!

1. Snap a pic of the little guy holding his arm out (I told him to hold an imaginary balloon.)


2. Use Photoshop or a site like Picnik.com and add your text.
3. Print at the drugstore.
4. Get out your exacto and make slits for the lollipop.


And your kid is ready for the party!


Love it!

Happy Love Day!


Friday, February 4, 2011

For the little mommies...

Once upon a time I bought some flannel. I put those 2 yards of flannel in a bag in a closet and my life resumed. End of story. But then I saw this: 'click here' And then I remembered why I had purchased that flannel at the fabric store clearance sale! I had seen a similar tutorial and I had every intention of making a wrap for my daughter's baby dolls. She is constantly bringing me a doll and a blanket and wanting me to swaddle her baby, only to walk away and to have the doll completely unraveled within seconds!

I owe a big THANK YOU to Leslie at Little Apple Seed for reminding me why I had a bag of flannel in my closet!

I followed her excellent directions:

Here's my 24" x 24" square (cute fabric, huh?)


Before I sewed on the pocket, I grabbed the largest of the dolls to make sure all of the babies could enjoy the comforts of swaddling (this baby is in one of my daughter's preemie outfits. Bittersweet memories!)


All sewn together:


Now here's where my wrap takes a different turn from the tutorial I referenced. I added some velcro:


I used sticky back so it would stay put when I figured out where to place it. Then I sewed the strips on.


I placed a set on the bottom tip and on the pocket:


And then one on each "wing." One on the inside and the other piece on the outside.


And swaddling your baby doll is as easy as 1 - 2 - 3!


And then watch your baby love her baby!


(She was not in a cooperative mood today so I had to sneak up on her and snap a pic while she was in a Little Bear trance!)


Thursday, December 30, 2010

Resolutions of the Harried Housewife

It's New Year's Eve so everyone is saying that word: Res-o-lution. Of course, there is the obvious resolution, the "I'm going to lose weight" one. But I'm gonna skip over that and talk about my #1 goal for the year....Get and STAY organized!

I have two kids, a husband, two dogs and a full time job. If I don't stay on top of things, my world can collapse quickly! The weeks when I'm really on top of things and I've spent the weekend meal planning, laundry and wardrobe planning for the coming week, things run like clock work. I love that and my resolution is to have more weeks like that!

So for today's post, I thought I'd share some of the little things that make my life just a wee bit easier. Enjoy!

Let's start in the bathroom.....

For a long time bath toys were the bane of my existence. They drove me crazy! I tried various storage options. Most of them involved suction cup holders that would work temporarily. But one day this idea came to me:

A plastic bucket. I had this from Easter. It's the same size as an ice cream bucket.


Flip it over and drill or poke holes in the bottom.


Now you have a bucket of wet toys to perch in the corner of the tub that will drain on it's own.


This time of year seems to bring an abundance of coffee mugs in gift baskets from vendors and coworkers. I've put some of those mugs to use in the medicine cabinet with the kids toothpaste and brushes.


And also in the medicine cabinet a coffee mug or an old butter container can hold all those tubes and small bottles.


And in the tub, these Link-a-doos clip anywhere and are great for holding shower/bath accessories.


On to the kids rooms...

I discovered these jumbo, 2.5 gallon ziploc bags and I love them!


Perfect for the toys with lots of pieces! And the zipper top makes it kid-friendly. I put games, train sets, Lego sets.... I just seal them up and toss them into the toy box. Takes a little bit of training but the kids eventually start to cooperate and put the stuff back in the bags!


And don't forget the wipe boxes. Perfect for some toys too!


This last idea is a great one for the summer months. If you have kids in and out all day asking for drinks, doing this keeps the beverages coming quickly.

I used these snack containers. They are 9.5 oz each.


I put a cup of sugar and add a packet of kool-aid in the container.


Seal it up and tape the flavor to the top.


And I have Kool-aid ready to mix when the thirsty neighborhood invades my backyard.


These aren't life-changing ideas but I know, in my house, any shortcut helps!
I'd love to hear any household ideas/tips you have to share!

Happy New Year!!


Friday, October 29, 2010

“Sometimes the questions are complicated and the answers are simple.” - Dr. Seuss

My son’s book collection was getting a little out of control (thanks to those great Scholastic book orders that come home from school every month!) So I moved a little, Target brand bookcase into his room (and this isn't even all of the books!):

Turns out that my son would never make it working in a library. He cannot shelf a book to save his life! I was spending way too much time sweeping out books from under his bed because he just couldn't (and wouldn't) put them on the shelf. And I wasn't real thrilled with the fake wood bookcase that didn't match the rest of his room.

So I decided that I wanted these:


Yes...these are from Pottery Barn. Now
If you’re like me when you get the Pottery Barn Kids catalog you want everything on every page! If only I had an unlimited amount of money with a house with an unlimited amount of space! But lucky for me I have something better -- a husband with an unlimited amount of talent!

The love of my life tore the page from the catalog, hung it in his workshop and in a couple of months (give him a break...he works a lot!) I had these:


I could not be more thrilled! Aren't they great?! Unfortunately he did not take any pictures of the process or document their making in any way. BUT...I found a tutorial after he finished these on Ana-White.com.

P.S. The bookcase made it's way across the hall to my daughter's room. But it's home there is temporary because my uber talented husband is making THIS from this tutorial! Thank you Ana White and thank you Super Dad!!!